Krok 2: Wzgórze. Bierzemy kawał styroduru i rysujemy sobie kształt wzgórza. Należy pamiętać, że wzgórze ma być modułowe, czyli miejsca styku muszą mieć tę samą długość (u mnie 25 cm). Jeżeli chcemy mieć kolejne poziomy wycinamy dalej nowy kawałek tylko już mniejszy. Później za pomocą metalowej linijki skrobiemy sobie po krawędzi robiąc ładną fakturę skały (robi się bałagan). A jeszcze później bierzemy kamień (tak kamień, to wcale nie prawda że nie wolno traktować swojego terenu kamieniem. Tylko należy to robić, zanim się go zacznie używać :P) i robimy nim dodatkową nieregularną fakturę skały. Pozostaje tylko skleić poziomy razem i przykleić je do planszy. A następnie wypełnić szpachlą wszelkie dziury i szczeliny. Et voila.
Step 2: A Hill. We take a piece of styrofoam and draw a shape of a hill on it . Keep in mind that hill has to be modular, ie the contact points must have the same length (in my case 25 cm). If we need more levels we cut another piece but smaller this time. Later, using a metal ruler we scrape the edge of the hil making a nice texture of rock (it gets messy). And next we use a rock (yes, a rock, it's not true that you can not treat your terrain with a rock. Only it should be done before you start to use that terrain: P) to make extra irregular rocky texture in the hills. It only remains to glue the levels together and attach them to the board. And then fill all the holes and crevices with spackle. Et voila.
Kilka inspiracji.
A few inspirations
https://www.youtube.com/watch?v=Xok2tqBEhvQ
https://www.youtube.com/watch?v=TlEcHkZLxiA
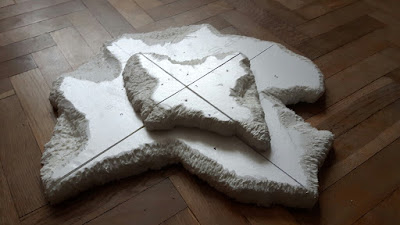 |
| Podstawowy kształt |
 |
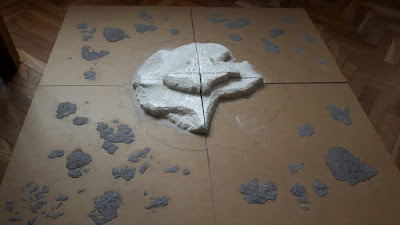
| Jedna z możliwych konfiguracji |
 |
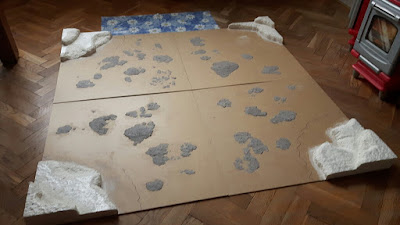
| Druga z możliwych konfiguracji |
 |
| I trzecia |
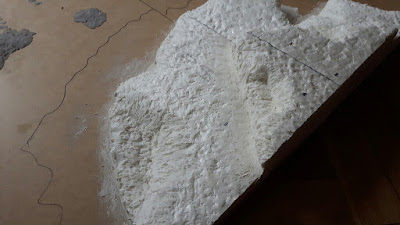 |
| Faktura wzgórza |
